Showing posts with label pattern storage. Show all posts

Sunday, March 13, 2016

The Cataloging Process

Having recently come to terms with my pattern addiction which has resulted in an accumulation of well over 700 patterns, it was important for me to develop a process which allowed me to protect my collection from light and dust exposure, while enabling me to quickly and effortlessly review them when searching for a specific pattern or a design element to incorporate in a garment.

I shared in previous posts (here and here) the evolutionary process of my storage methods, up to and including the one I'm currently using (see here and here). With my desire to protect my collection from environmental elements satisfied, I focused on developing a method of cataloging the full collection so I'd be able to browse through them without having to take down each box and literally flip through every pattern. I used to do just that...an extremely tedious process which often isolated me from my family.  So, I really wanted more of an e-cataloging process which would work for me.

I absolutely love a good pattern sale, so after purchasing new ones, I mark on the envelope the date they were purchased and proceed to scan the envelope front and back images to my computer.  For about a year now, however, I've been purchasing vintage patterns from various outlets, primarily eBay.  Once they're finally delivered, I take inventory of each pattern to determine its condition and completeness.  Most of the ones I've purchased have been in pretty good shape, while the components of others - envelope, instruction sheets and pattern pieces - need special handling and/or repair.


Sunday, October 4, 2015

The Dresser Refinish

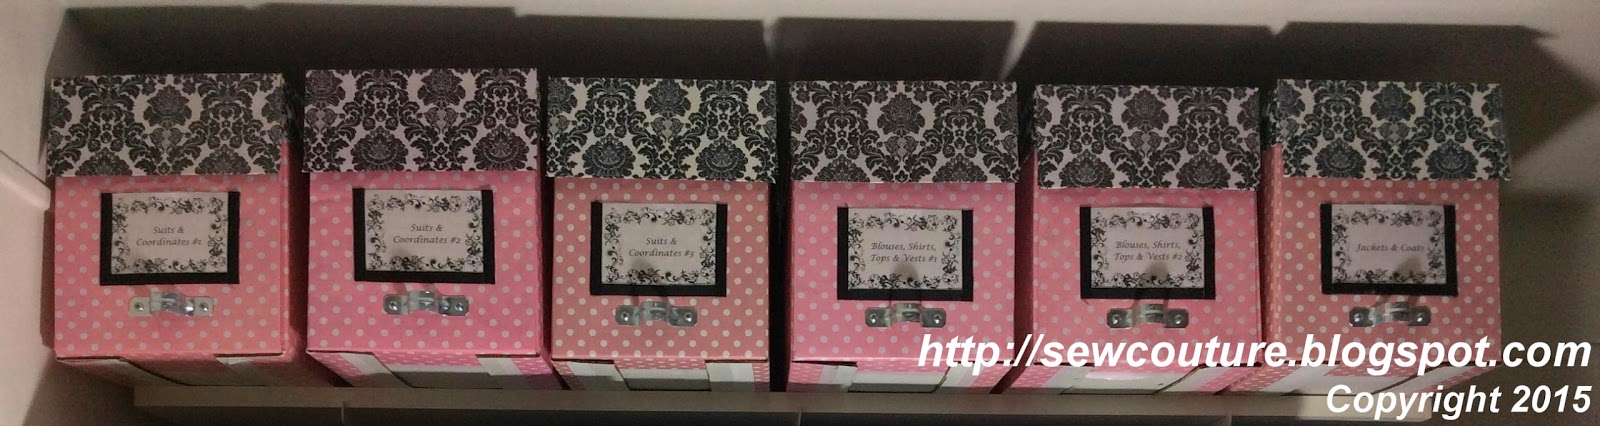
I shared with you how busy my spring and summer has been due to the amount of travelling I had to do for work.  Well, now that the travel has slowed down, I've been able to devote time to making my sewing space visually appealing.  I finally got all of my pattern boxes decorated, assembled, labeled and filled.  Yes, a couple of them are decorated differently, and the color saturation on others is a little off, but they're all done.  I will revisit the "odd" units at another time.


Saturday, February 28, 2015

Making Storage Beautiful - Pt. 4: To Seal or Not to Seal...

...that is the question!

Welcome to this fourth post on creating pattern storage boxes.  I shared with you in an earlier post that I've tried a variety of storage methods for my pattern collection, and I honestly feel the current method I've employed is working the best for me.  The boxes I'm creating are very sturdy and durable while protecting my patterns from dust and light exposure, and will coordinate beautifully with my Sewing Room's planned decor.


Wednesday, February 25, 2015

Making Storage Beautiful - Part 3: Decorative Paper Prep

Welcome to this third post detailing my steps in creating pattern storage boxes.  In the first two posts, I shared with you the design inspiration for my boxes and the steps involved with the resizing and surface preparation of the cartons being used.  In this post, I will share with you the steps for creating and preparing the papers to decorate the storage box and maintain its continuous decorative pattern.


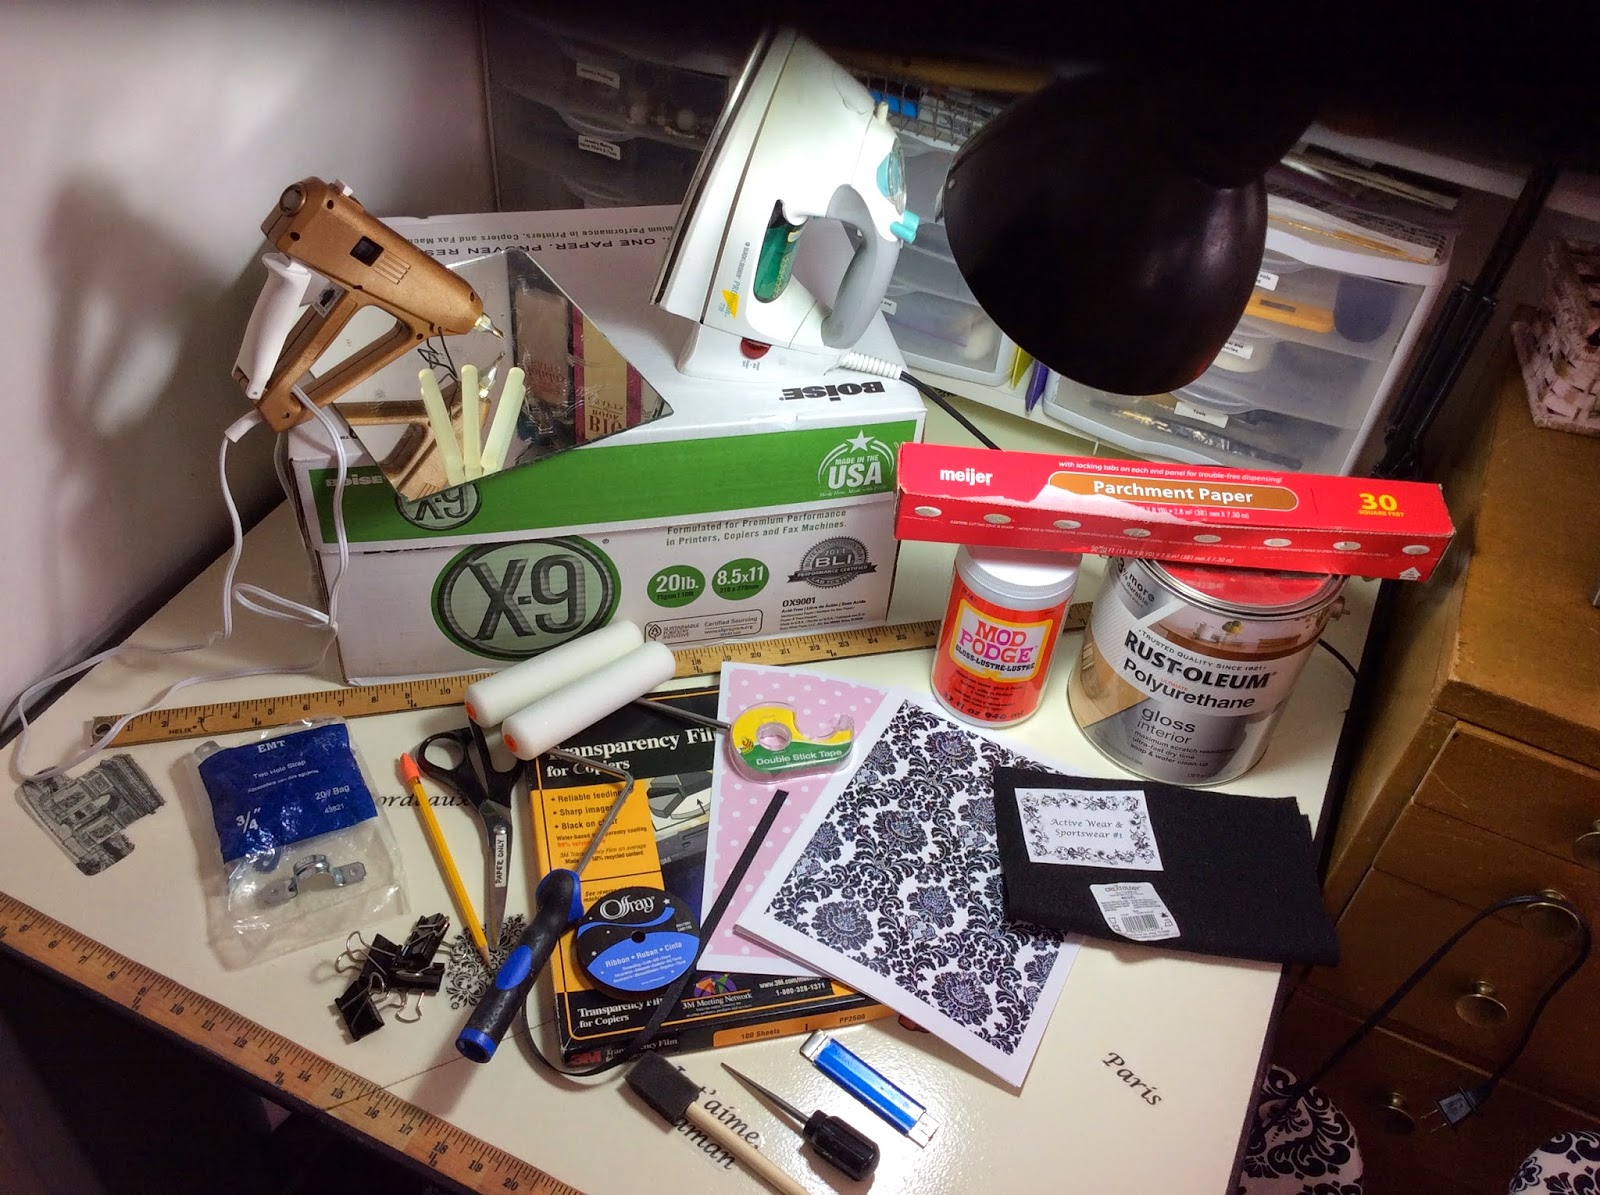
The tools and supplies you'll need are:


Tuesday, February 17, 2015

Making Storage Beautiful - Part 2: The Foundation

The first, and arguable most important, stage in creating my pattern storage boxes is in the gathering and preparation of materials.  I've found through trial-and-error that the quality of the end product depends on this work, and reminds me of a well-known saying that's attributed to Philip Stanhope, 4th Earl of Chesterfield:

"Whatever is worth doing at all is worth doing well."

Pictured are the tools and supplies I used from start to finish, but let's begin with a list of those materials needed during this stage of the process:

Thursday, February 12, 2015

Making Storage Beautiful - Part 1: The Inspiration

It's no secret I've been a neglectful blogger, with no published posts between May 2013 and January 2015.  But while my documentation and sharing has been scarce, I have moderated and replied to comments left on various past posts as well as follow my other favorite bloggers.  I've also spent time in my Sewing Room doing...stuff.  Most of my creative energies have been spent making my space organized, visually appealing and creatively inspiring.  On that note, I'd like to share with you the detailed process I follow in making my pattern storage boxes.


Monday, October 3, 2011

Looking for Pattern Storage Nirvana

I mentioned in a previous post that I enjoy seeking improvements in the organization and décor of my Sewing Room, and so both have kept my thoughts preoccupied over the summer.  I shared with you that one of my biggest challenges is storing my collection of sewing patterns and how my storage “system” has gone through an evolutionary process, progressing from a discarded store display cabinet up to the pattern storage boxes I purchased from Hancock Fabrics some years back.  These purchased boxes are working, but the problem I have is they can accommodate “just so many” patterns.


As you can see, I have each one labeled with a pattern category, and some of them are at full capacity – I cannot fit one more pattern into the box!

Storage box at full capacity.
Also, I cannot add another box to the shelves without moving it to another area of the room, which is not ideal.  I am one of those a-place-for-everything-and-everything-in-its-place type people so I need organization for activities like sewing, which rely heavily on quick access to a wide variety of tools and notions.  I’m also somewhat frugal (thank you, Mommy!) and always looking for ways to get a job done for the best possible price – preferably free!  So, I’m often thinking about how this system can be improved.

In May, my family and I went to the Motor City Comic Convention (Comic Con).  If you ever get a chance to attend a Comic Con, I highly recommend doing so.  It’s a fun time, if for no other reason than to people-watch.  While there, I noticed that all of the comic book vendors stored their comics in these really neat lidded boxes.  Some of them were very deep, and I thought “Wow!  This may work for my patterns!”

So, when we returned home, I went online and was able to find a couple of sources for these boxes.  The width and height were perfect, and they were even available in a variety of depths – “COOL!!”  But, my enthusiasm was curbed when I saw the price – they sold for approximately $6 each.  Given the approximate number of boxes I’d need, it would cost me at least $60 to purchase these boxes – way outside of my target price range.

So, I started thinking about how I could create boxes like these, given my specific storage needs and cost demands.  The solution – the cartons which are used to ship printer paper in bulk.


Once the paper is used, these cartons are usually discarded.  My sense of frugality was well satisfied – what’s better than free?  So, after playing around with cutting and pasting, I was able to scale-down the carton size so it could accommodate my patterns and still sit neatly on the shelf with a little over-hang.

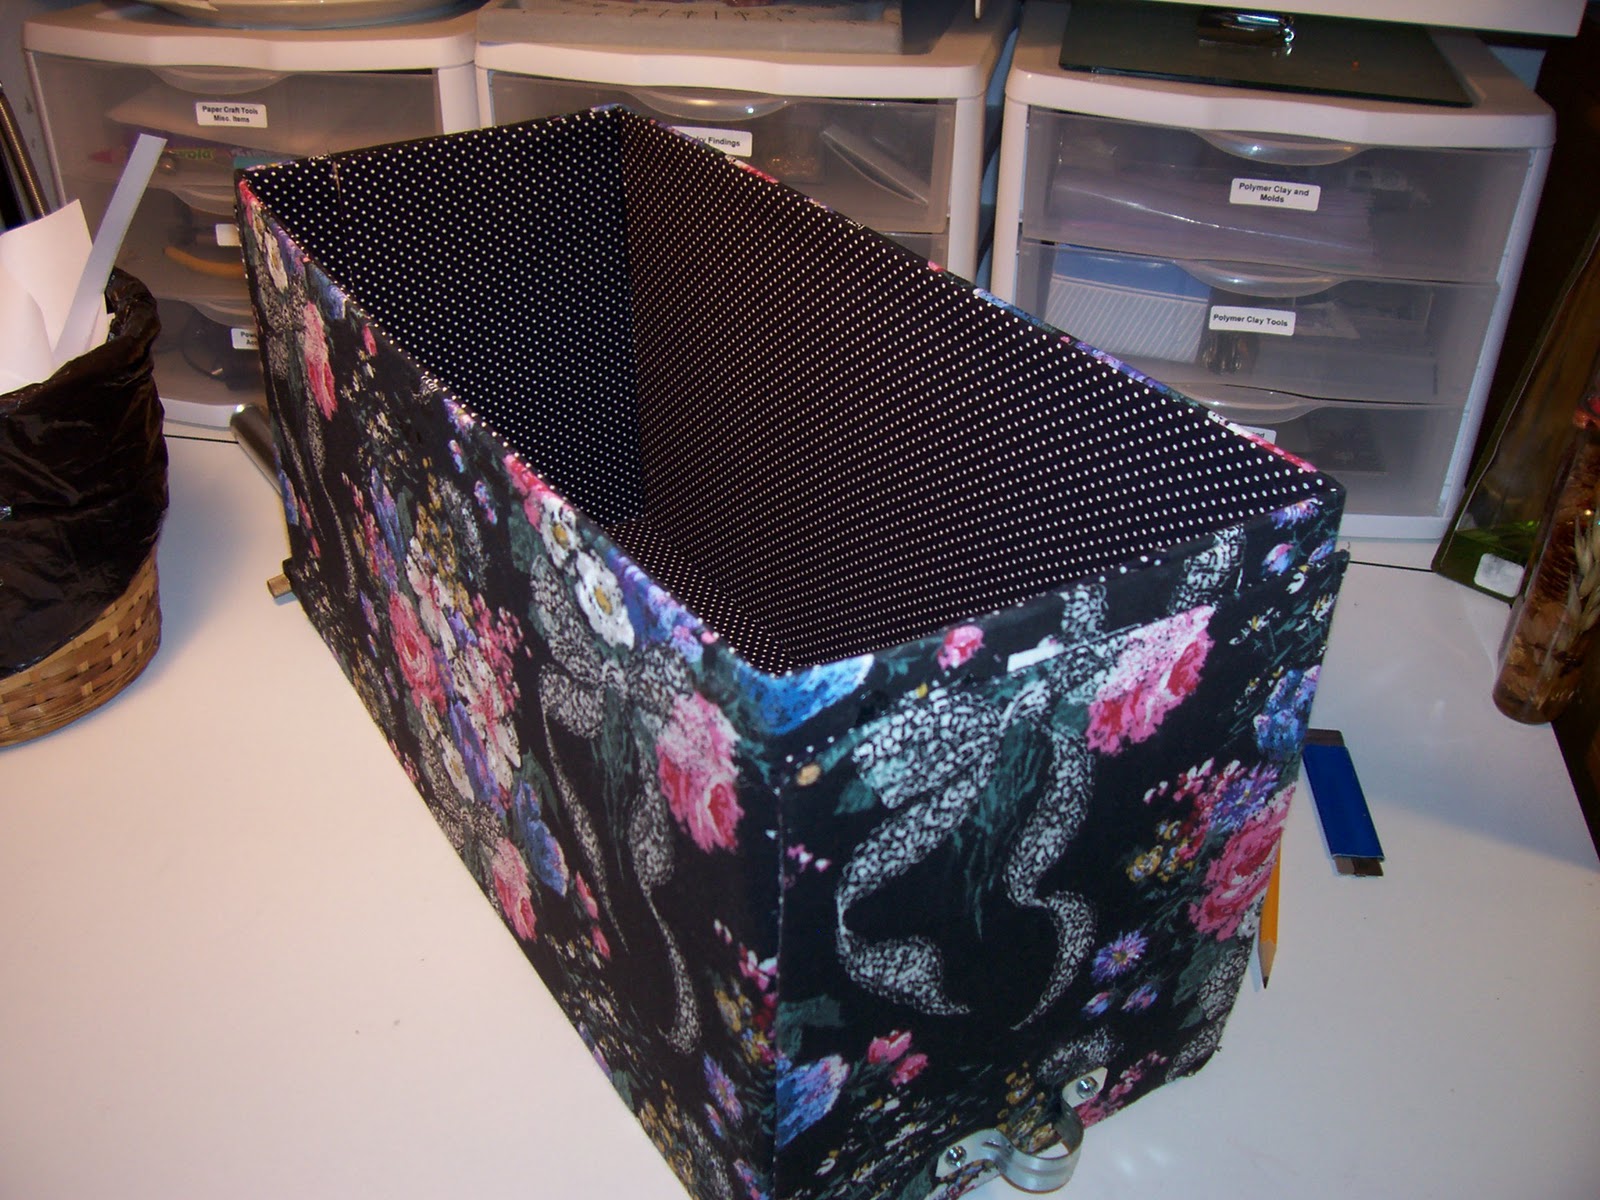
The next consideration was decorating the box so it would be visually pleasing and still fit in with any future décor changes I may want to make.  I used some fabric I had on-hand to cover and line the first box, but I realized that it would not be enough to cover all of the boxes I’d need, and the cost to purchase more fabric to cover these boxes didn't seem worth the investment.


Also, I was concerned about the fabric being so dark and the affect it would have on the room’s lighting, not to mention other issues like dust, fading, coordination with future décor choices, etc.  So, I wanted to go with a lighter-colored design choice which still fell in line with my need for minimal cost.

Well, suffice it to say that I could not find a fabric option which met my design and cost needs, so I decided to do a form of decoupage instead.  I found some fabric “art” online and used it to create decorative paper which I printed and glued to the box. 

Isn't "she" pretty?

I also bought a supply of pipe-fitting clamps from Lowe’s which I used as an extremely inexpensive box handle (thanks for this great idea Sew Many Ways), and – Tada!! – I have new pattern storage boxes, each of which can hold approximately 33% more than my Hancock boxes.
I've since added felt to the box to "pretty up" the bottom.
So, I’ll be converting over to my newly developed – and cheap – storage system.  I think I’ve finally achieved pattern storage nirvana!!  Tell me what you think.

Be blessed!

Aisha


Friday, May 6, 2011

The Pattern Storage Challenge

Back in anceint times a.k.a. the eighties, when I was 19 years old, I began working as a sales clerk for So-Fro Fabrics.  During the following 3 years, I transferred to a different store location, was promoted to Second Assistant Manager (for a whopping 50-cents more per hour - lol), met and worked with great people who possessed vast sewing knowledge and experience and was willing to share, and accumulated a pretty impressive collection of sewing patterns.  I look back on my time there with a great deal of fondness and nostalgia.  And while So-Fro Fabrics is no more - being officially bought-out by JoAnn's in the late 1990s - I still have that impressive pattern collection.

As other sewing enthusiasts know, the major pattern companies discontinue patterns to make room for new designs they're releasing.  Now that these companies sell patterns via their respective Internet sites, you are still able to purchase an "Out of Print" pattern directly from the manufacturer.  But, back in the day, you were only able to purchase patterns from an authorized retailer.  So, once that store's staff pulled those discontinued patterns from their cabinets and destroyed them, it was a done deal.  That pattern was gone forever...at least in theory.

One of the fringe benefits of working for So-Fro was they allowed us to scan through and keep those discontinued patterns prior to their destruction.  This was, without a doubt, my favorite time in the store.  I recall how excited I'd become when I'd get to work and one of my co-workers would announce "We have discards!!"  It was like going shopping for free.  So, as a result, I brought home LOTS of patterns during my tenure there.  So much so, that I purged approximately 100 or so about 4 or 5 years ago and donated them to charity.  I could kick myself now, seeing how popular "vintage" patterns are on the web, but what's done is done.

Owning so many patterns posses a storage challenge, and I've tried various methods over the past 20+ years:
  • An abandoned store display cabinet I rescued from the landfills - it later found it's way there, however, once I outgrew it.
  • Cardboard boxes I saved from purchasing Clorox Bleach from Sam's Club.  This was actually a pretty good solutions, once I trimmed down the box height and covered them with contact paper to make them look more atttractive.  My only issue - my patterns would be uncovered and vulnerable to dust and light exposure.
  • Quart-size ziplock bags - the perfect size for most pattern envelopes and contents, plus it blocked out dust - but, alas, not light.
  • Finally, covered pattern storage boxes I found at Hancock Fabrics - before they closed all of their Michigan stores.


While my current solution addresses the dust and light issue, I noticed these covered boxes are not as deep as my converted Clorox boxes, and therefore cannot accommodate the same quantity.  Plus, I'm not all that thrilled with the box's "decoration" - it's not really my color or style.  So, I'm still thinking about other, possibly better storage options.  But, it's working for now.


What storage solutions have you adopted?