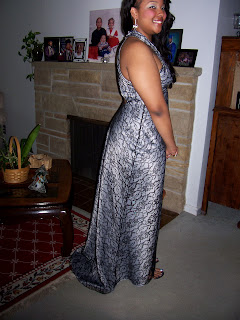
His tuxedo was black with gray accents (vest, tie, hankie), so she decided to go with a gray sparkle satin-type fabric with a black lace overlay.
Before cutting into the fashion fabric, I made a test muslin of the garment. I highly recommend making a test muslin, if for no other reason, to be able to test-run the pattern instructions. By the time I got to making the actual dress, I was pretty comfortable with the step-by-step, enough so that I sometimes deviated from the printed instructions.
You may recall from earlier posts that she has what I describe as a "narrow back". I have to make adjustments to the back bodice on any garments I make for her - especially close-fitting ones - and this dress was no exception.
I was pleased that the needed adjustment was just a dart on either side near the waist band.
Once I dismantled the muslin bodice, I pressed the adjusted back bodice piece, and decided to use it to cut the fashion fabric to avoid putting a dart in the actual garment.
I'd be a liar if I said I was unconcerned about the angle toward the bottom of the bodice piece, but I went with it.
I cut out and constructed the dress Sunday evening into Monday morning. I allowed the dress to hang so the bias cuts could settle before completing the final task of hemming the lining, dress and lace overlay on Monday night/Tuesday morning.
And, here's the final product...
 |
| Check out the finger and toe nail color - I LOVE IT!! |
 |
| BTW - asked to wear MY earrings after I saw them dangling from her ears - DAUGHTERS!! |
Here's a closer view of the back bodice. Despite my concerns, you can see the bodice fits closely to her back with the "implied" dart.
 |
| The obligatory "corsage presentation" photo... |
 |
| Hmm...looks like he approves |
Be blessed!
Aisha


No comments:
Post a Comment