I shared in previous posts (here and here) the evolutionary process of my storage methods, up to and including the one I'm currently using (see here and here). With my desire to protect my collection from environmental elements satisfied, I focused on developing a method of cataloging the full collection so I'd be able to browse through them without having to take down each box and literally flip through every pattern. I used to do just that...an extremely tedious process which often isolated me from my family. So, I really wanted more of an e-cataloging process which would work for me.
I absolutely love a good pattern sale, so after purchasing new ones, I mark on the envelope the date they were purchased and proceed to scan the envelope front and back images to my computer. For about a year now, however, I've been purchasing vintage patterns from various outlets, primarily eBay. Once they're finally delivered, I take inventory of each pattern to determine its condition and completeness. Most of the ones I've purchased have been in pretty good shape, while the components of others - envelope, instruction sheets and pattern pieces - need special handling and/or repair.
I use my iron on a dry setting to press out folds and wrinkles on the pattern envelope and flatten it out for scanning. I then document on the envelope back when, and sometimes where, I purchased the pattern.
I thought documenting the purchase date on my envelopes was my personal idiosyncrasy, but I've since discovered that other sewing-enthusiasts do the same, so I'm in good company.
I've had doubts about pressing out the envelopes, especially for those which seem especially fragile, but I honestly feel taking this steps helps minimize further damage to those envelopes that are weakened by light and dust exposure.
Vogue 7830, before and after pressing
Sometimes, additional steps are needed for envelopes in "handle with extreme care" condition. This was the case with Simplicity 3425 which I recently purchased in an auction lot of patterns from eBay. This envelope looks better now than it did when it arrived, but it's still quite fragile, with pieces of its edges falling away with handling. First, I verified the envelope will easily fit inside a standard 6x9 mailing envelope.
I then printed the pattern envelope's front and back image on the front/back of the 6x9, and slide the original envelope inside.
The replacement envelope, instructions sheets and pattern pieces are then placed inside a zip lock bag, and filed away in my pattern file.
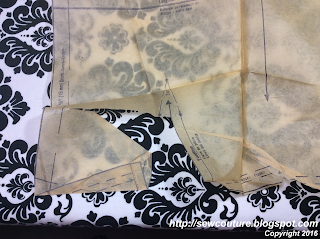
After pressing flat the pattern envelope, I then examine the condition of the pattern instructions sheets (all sheets included, tearing, etc.) and the pattern pieces (factory-folded vs. cut, all pieces included, sizes they're cut on for multi-sized patterns, any tearing or worn areas, etc.)
If need, I press the instructions sheets with a dry iron and apply tape to torn folds and edges to reinforce sheets and envelopes.
I don't like using transparent tape, however, to repair pattern pieces because they need to be pressed to remove wrinkles before laying out on fabric and the heat warps the taped area. Instead, I apply light-weight fusible interfacing to the wrong-side of the pattern piece to mend any rips, tears or worn areas.
Sometimes, a pattern piece can be so worn that reinforcing the entire piece with interfacing is necessary to restore strength and stability so it can be used.
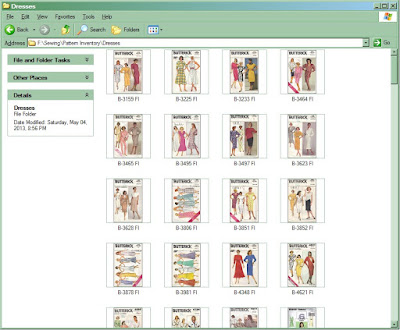
Once the instruction sheets and pattern pieces have been inventoried and mended, I then scan the front and back of the pattern envelope...
...and use Word to format and save the images as a PDF document.
Once saved, I am able to quickly - and easily - browse through each category of my collection on my computer.
There are moments when I wish to peruse my collection away from my computer, so I've created a Box.com account and uploaded my collection so I can flip through them on any internet-connect device.
While it appears to be time-consuming (and sometimes it feels like it), this process really is the best for me because I know my collection is protected, handled only when necessary, and is so easy for me when I want to review them and contemplate what I'd like to create next.
What is the process you use to store and/or catalog your pattern collection? Please share - I love reading your comments.
Be blessed!
Aisha


Wonderful cataloging system and nice set of vintage patterns too.
ReplyDeleteThank you, Faye.
DeleteTHANK YOU SO MUCH for all the information and the time it took you to put all that together. It was so helpful to me and inspired me to get mine organized. Again thank you.
DeleteSharon i am so glad you found it helpful, and thank you so much for reading and sharing your thoughts.
DeleteWow! Aisha, I just LOVE what you have done here. While it seems very time consuming, it sounds very efficient. I would imagine that once it's all set up, adding to the collection isn't too bad if you're only adding a few patterns at a time. You have a nice system and have inspired me.
ReplyDeleteMy current pattern storage system is a simple one. With a little more attention it can be better. The only thing I've done is copied the front and back of my envelopes and placed them in a binder. Then all my patterns are stored, by company, in boxes. My binder is at capacity now, so I have planned to add more binders and categorize them by garment type (skirts, pants, tops, dresses, etc.). I heard other sew sisters mention that they store their patterns on Pinterest, so I thought I would try that. However, I like the idea of being able to view the inventory from any device. I especially need to have access to it when I'm at the fabric store purchasing more patterns. I'll figure it all out and get it done. I feel better when things are organized.
Thanks for sharing your system. I will check out your other posts on organization. Have a great day.
Anita, I so agree with the points you raised, especially the need to be able to view your collection while at the store. It's kind of deflating when you purchase a pattern you already own. Having the collection on Box helps eliminate this from happening. Thank you so much for your comments...I really do appreciate it, and please let me know how your organizational efforts progress...I LOVE seeing how other sew-sisters organize their spaces.
DeleteWow! You're hardcore and I love it! That's your investment and you're protecting it well. I don't know anyone who can touch you on this! I've bought pattern hangers to use for the patterns I've drafted myself and made in cardboard.
ReplyDeleteThank you so much, Miss J. I truly appreciate the compliment.
DeleteWow.. That is really amazing as far as how you have everything organized. I've only just moved from a jumbled couple of plastic totes to the comic book box holders with the comic sleeves, and then saw your posting showing the zip lock bags and nearly slammed my head into the table thinking why didn't I know this? Lol. So now I'm probably going to scrap the comic sleeves and go with the ziplock bags. It will make me feel more organized and right now my craft room is looking like a fabric bomb went off with the pattern assassins hiding from the corners. It's really needing some help right now... 😭😭😭
ReplyDeleteI know how you feel when you see a very simple solution someone else used to solve a common problem. I find having order in my sewing space sparks my creativity and gets me in the sewing mood. Thank you so much for reading the post and taking time to share your comments - I really appreciate it!!
Delete